1. First, put your camera card into the slot in your laptop.
2. Right-click the Start Menu (you will see the menu below) and choose Open Windows Explorer.

3. Once Windows Explorer opens you will see a window that looks similar to the one below. In the left frame you will see DCIM, double-click on the folder.

4. Now, you will see the window below. You may see multiple folders depending on what your card has been used for (multiple cameras, scanner, etc). Double-click on each one until you see your photos.

5. Now, you should see this window (below) with your pictures either listed as names or you may see them as mini-pictures.

6. Now, go back to step one and right-click on your start menu again and choose Open Windows Explorer. Do not close the window that you already have open with your pictures. Once the 2nd window pops up try to move it to the side of the other window, like below. You can grab a window and move it by touching the top bar of the window with your cursor and then by holding down your left mouse button drag it to where you want it. The should be side to side.
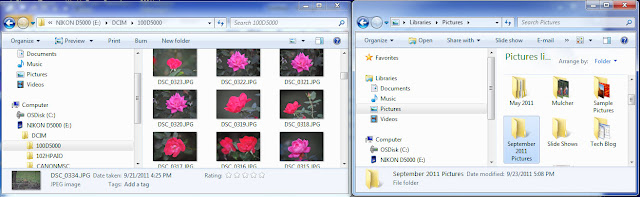
7. On the window on the right click browse to the folder where you would like your pictures to reside. I suggest putting them into your My Documents Pictures folder. Once you are in the correct folder click on the "New Folder" button (see red arrow below). Name your folder a name that will be easy to remember based on the pictures that you are moving over. For this example, I'm naming my folder "September 2011 Pictures".

8. After you hit enter after naming the folder you will see it in the list of folders in the window on the right.

9. Now, double-click on it to open it. It will look like the folder below.

10. Now, with the window on the left. Click on one of the pictures and then hold down Shift and the "A" key on your keyboard at the same time. This will highlight all of the pictures on your card. While they are still highlighted move your cursor so it is hovering over one of the pictures and RIGHT-click on it. Choose Cut (Choose Copy if you want to leave the pictures on your camera card).

11. Move your cursor to the empty space in the right window (where you created your new folder for your pictures in step 7) and right-click the empty space. Choose Paste.
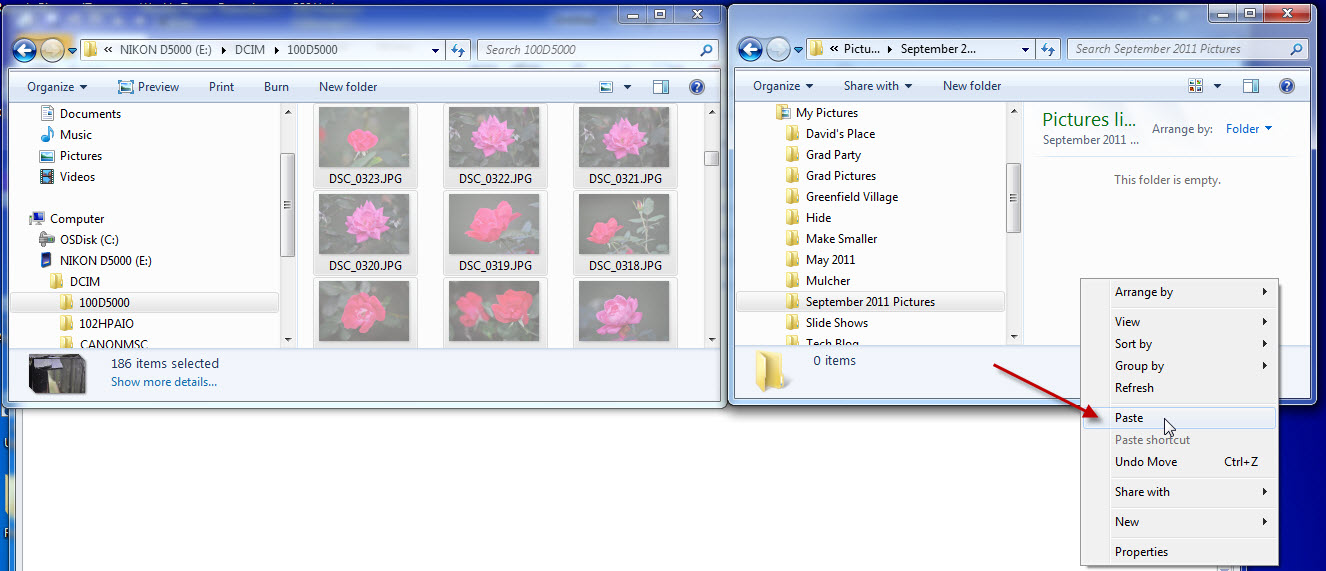
12. You will see a window like the one below:

13. Now, your pictures have been successfully moved to your hard drive. To remove the card from your machine, click on the little arrow next to the time on your start menu. You will see the icon below.
14. Right-click the icon and choose Eject.
You can now remove your card and place it back in your camera.
Next post....how to email pictures or upload them to facebook.
No comments:
Post a Comment